GUI编程

1、简介

GUI的核心技术: Swing AWT,界面不美观

不流行的原因:

  • 因为界面不美观
  • 需要JRE环境

为什么我们要学习?

  • 可以写出自己心中想要的小工具
  • 工作时候也可能维护swing界面
  • 了解MVC架构,了解监听

2、AWT

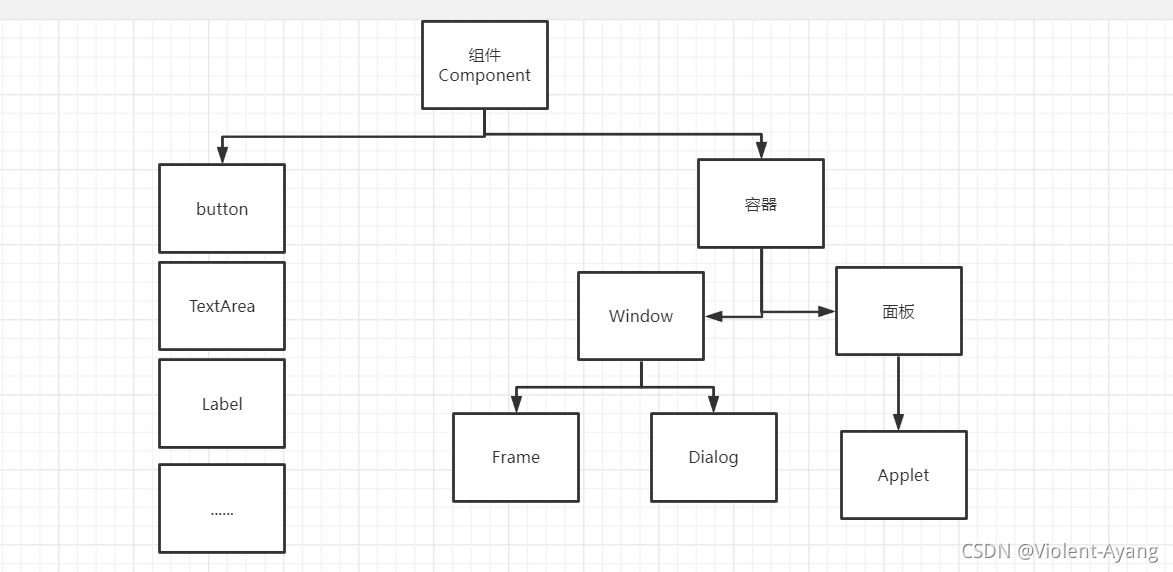
2.1、AWT介绍

  1. 包含了很多类和接口!GUI!
  2. 元素:窗口,按钮,文本窗
  3. java.awt
    在这里插入图片描述

2.2、组件和容器

1.Frame

1
2
3
4
5
6
7
8
9
10
11
12
13
14
15
16
17
18
19
20
21
22
package GUI.lesson1;

//GUI的第一个界面

import java.awt.*;

public class TestFrame {
public static void main(String[] args) {
//Frame,JDK
Frame frame = new Frame("我的第一个Java图形界面窗口");
//需要设置可见性
frame.setVisible(true);
//设置窗口大小
frame.setSize(400,400);
//设置背景颜色 Color
frame.setBackground(new Color(69, 108, 41));
//弹出的初始位置
frame.setLocation(200,200);
//设置大小固定
frame.setResizable(false);
}
}

回顾封装:

1
2
3
4
5
6
7
8
9
10
11
12
13
14
15
16
17
18
19
20
21
22
package GUI.lesson1;

import java.awt.*;

public class TestFrame2 {
public static void main(String[] args) {
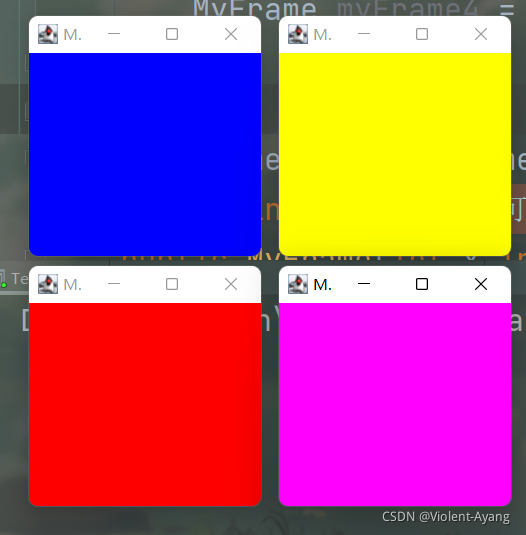
//展示多个窗口
MyFrame myFrame1 = new MyFrame(100, 100, 200, 200, Color.blue);
MyFrame myFrame2 = new MyFrame(300, 100, 200, 200, Color.yellow);
MyFrame myFrame3 = new MyFrame(100, 300, 200, 200, Color.red);
MyFrame myFrame4 = new MyFrame(300, 300, 200, 200, Color.MAGENTA);
}
}
class MyFrame extends Frame{
static int id = 0; //可能有多个窗口,我们需要一个计数器
public MyFrame(int x,int y,int w,int h,Color color){
super("MyFrame"+(++id));
setBackground(color);
setBounds(x,y,w,h);
setVisible(true);
}
}

在这里插入图片描述

2.面板Panel

解决了关闭事件

1
2
3
4
5
6
7
8
9
10
11
12
13
14
15
16
17
18
19
20
21
22
23
24
25
26
27
28
29
30
31
32
33
34
35
36
37
38
package GUI.lesson1;

//Panel 可以看成是一个空间,但是不能单独存在

import java.awt.*;
import java.awt.event.WindowAdapter;
import java.awt.event.WindowEvent;

public class TestPanel {
public static void main(String[] args) {
Frame frame = new Frame();
//布局的概念
Panel panel = new Panel();
//设置布局
frame.setLayout(null);
//坐标
frame.setBounds(300,300,500,500);
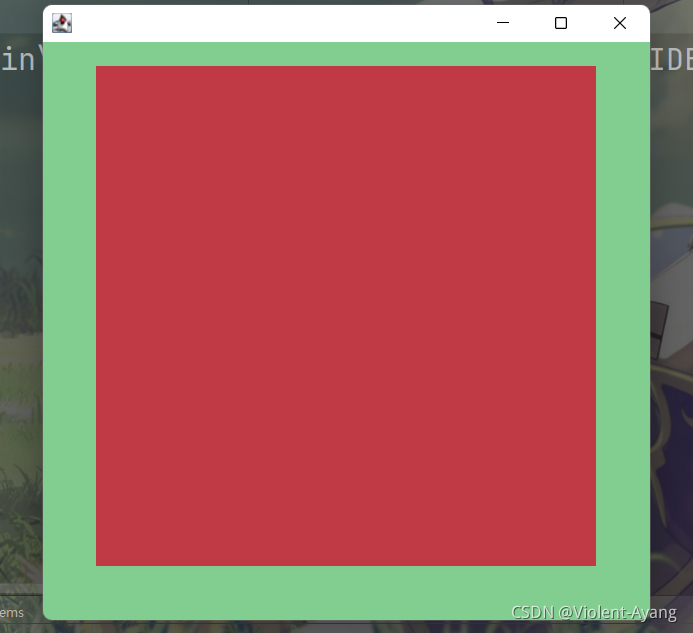
frame.setBackground(new Color(0x81CE90));
//panel设置坐标,相对于frame
panel.setBounds(50,50,400,400);
panel.setBackground(new Color(0xDBE04452, true));
//frame.add(panel)
frame.add(panel);

frame.setVisible(true);
//监听事件,监听窗口关闭事件 System.exit(0)
//适配器模式
frame.addWindowListener(new WindowAdapter() {
//窗口点击关闭时候需要做的事情
@Override
public void windowClosing(WindowEvent e) {
//结束程序
System.exit(0);
}
});
}
}

在这里插入图片描述

2.3、布局管理器

  • 流式布局
1
2
3
4
5
6
7
8
9
10
11
12
13
14
15
16
17
18
19
20
21
22
23
package GUI.lesson1;

import java.awt.*;

public class TestFlowLayout {
public static void main(String[] args) {
Frame frame = new Frame();
//组件-按钮
Button button1 = new Button("button1");
Button button2 = new Button("button2");
Button button3 = new Button("button3");
//设置为流式布局
// frame.setLayout(new FlowLayout());
frame.setLayout(new FlowLayout(FlowLayout.LEFT));
frame.setSize(200,200);
frame.setVisible(true);
//把按钮添加上去
frame.add(button1);
frame.add(button2);
frame.add(button3);
}
}

  • 东西南北中
1
2
3
4
5
6
7
8
9
10
11
12
13
14
15
16
17
18
19
20
21
22
package GUI.lesson1;

import java.awt.*;

public class TestBorderLayout {
public static void main(String[] args) {
Frame frame = new Frame("TestBorderLayout");
Button east = new Button("east");
Button west = new Button("west");
Button south = new Button("south");
Button north = new Button("north");
Button center = new Button("center");
frame.add(east,BorderLayout.EAST);
frame.add(west,BorderLayout.WEST);
frame.add(center,BorderLayout.CENTER);
frame.add(south,BorderLayout.SOUTH);
frame.add(north,BorderLayout.NORTH);
frame.setSize(200,200);
frame.setVisible(true);
}
}

  • 表格布局
1
2
3
4
5
6
7
8
9
10
11
12
13
14
15
16
17
18
19
20
21
22
23
24
25
26
27
28
29
30
31
32
33
34
35
36
37
38
package GUI.lesson1;

import java.awt.*;
import java.awt.event.WindowAdapter;
import java.awt.event.WindowEvent;

public class TestGridLayout {
public static void main(String[] args) {
Frame frame = new Frame("TestBorderLayout");

Button btn1 = new Button("btn1");
Button btn2 = new Button("btn2");
Button btn3 = new Button("btn3");
Button btn4 = new Button("btn4");
Button btn5 = new Button("btn5");
Button btn6 = new Button("btn6");

frame.setLayout(new GridLayout(3,2));

frame.add(btn1);
frame.add(btn2);
frame.add(btn3);
frame.add(btn4);
frame.add(btn5);
frame.add(btn6);

frame.pack();//自动布局
frame.setVisible(true);

frame.addWindowListener(new WindowAdapter() {
@Override
public void windowClosing(WindowEvent e) {
System.exit(0);
}
});
}
}

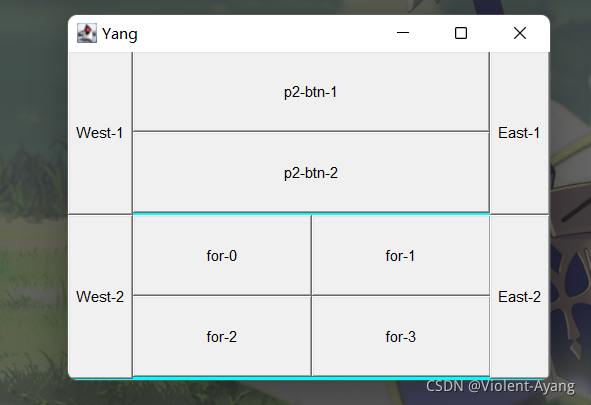
练习

在这里插入图片描述
在每块空格处加上按钮

1
2
3
4
5
6
7
8
9
10
11
12
13
14
15
16
17
18
19
20
21
22
23
24
25
26
27
28
29
30
31
32
33
34
35
36
37
38
39
40
41
42
43
44
45
46
47
package GUI.lesson1;

import javax.swing.*;
import java.awt.*;
import java.awt.event.WindowAdapter;
import java.awt.event.WindowEvent;
import java.awt.event.WindowListener;

public class Work {
public static void main(String[] args) {
//总frame窗 上下两层
Frame yang = new Frame("Yang");
yang.setVisible(true);
yang.setSize(400,300);
yang.setLocation(300,400);
yang.setBackground(Color.CYAN);
yang.setLayout(new GridLayout(2,1));
//4个面板
Panel p1 = new Panel(new BorderLayout());
Panel p2 = new Panel(new GridLayout(2,1));
Panel p3 = new Panel(new BorderLayout());
Panel p4 = new Panel(new GridLayout(2,2));
p1.add(new Button("East-1"),BorderLayout.EAST);
p1.add(new Button("West-1"),BorderLayout.WEST);
p2.add(new Button("p2-btn-1"));
p2.add(new Button("p2-btn-2"));

p1.add(p2,BorderLayout.CENTER);

p3.add(new Button("East-2"),BorderLayout.EAST);
p3.add(new Button("West-2"),BorderLayout.WEST);
for (int i = 0; i < 4; i++) {
p4.add(new Button("for-"+i));
}
p3.add(p4,BorderLayout.CENTER);

yang.add(p1);
yang.add(p3);

yang.addWindowListener(new WindowAdapter() {
@Override
public void windowClosing(WindowEvent e) {
System.exit(0);
}
});
}
}

在这里插入图片描述
总结:

  • 1.Frame是一个顶级窗口
  • 2.Panel 无法单独显示,必须添加到某个容器中
  • 3.布局管理器
    1.流式布局
    2.东西南北中
    3.表格布局

2.4、事件监听

事件监听:当某个事情发生的时候,干什么?

1
2
3
4
5
6
7
8
9
10
11
12
13
14
15
16
17
18
19
20
21
22
23
24
25
26
27
28
29
30
31
32
33
34
35
36
37
38
39
package GUI.lesson2;

import java.awt.*;
import java.awt.event.ActionEvent;
import java.awt.event.ActionListener;
import java.awt.event.WindowAdapter;
import java.awt.event.WindowEvent;

public class TestActionEvent {
public static void main(String[] args) {
//按下按钮,触发一些事件
Frame frame = new Frame();
Button button = new Button();
//因为addActionListener()需要一个ActionListener,所以我们需要构造一个ActionListener
MyActionListener myActionListener = new MyActionListener();
button.addActionListener(myActionListener);
frame.add(button,BorderLayout.CENTER);
frame.pack();
frame.setVisible(true);
windowClose(frame);
}
//关闭窗体的事件
private static void windowClose(Frame frame){
frame.addWindowListener(new WindowAdapter() {
@Override
public void windowClosing(WindowEvent e) {
System.exit(0);
}
});
}
}
//事件监听
class MyActionListener implements ActionListener{

@Override
public void actionPerformed(ActionEvent e) {
System.out.println("aaa");
}
}

多个按钮共享一个事件

1
2
3
4
5
6
7
8
9
10
11
12
13
14
15
16
17
18
19
20
21
22
23
24
25
26
27
28
29
30
31
32
33
34
35
package GUI.lesson2;

import java.awt.*;
import java.awt.event.ActionEvent;
import java.awt.event.ActionListener;

public class TestActionTwo {
public static void main(String[] args) {
//两个按钮,实现同一个监听
//开始 停止
Frame frame = new Frame("开始-停止");
Button button1 = new Button("start");
Button button2 = new Button("stop");

button2.setActionCommand("button-stop");

MyMonitor myMonitor = new MyMonitor();
button1.addActionListener(myMonitor);
button2.addActionListener(myMonitor);

frame.add(button1,BorderLayout.NORTH);
frame.add(button2,BorderLayout.SOUTH);
frame.pack();
frame.setVisible(true);
}
}
class MyMonitor implements ActionListener{

@Override
public void actionPerformed(ActionEvent e) {
//
System.out.println("按钮被点击了:msg"+e.getActionCommand());
}
}

2.5、输入框TextField

1
2
3
4
5
6
7
8
9
10
11
12
13
14
15
16
17
18
19
20
21
22
23
24
25
26
27
28
29
30
31
32
33
34
35
36
package GUI.lesson2;

import java.awt.*;
import java.awt.event.ActionEvent;
import java.awt.event.ActionListener;

public class TestText01 {
public static void main(String[] args) {
//启动
new MyFrame();
}
}
class MyFrame extends Frame{
public MyFrame(){
TextField textField = new TextField();
add(textField);
//监听这个文本框输入的文字
MyActionListener2 my2 = new MyActionListener2();
textField.addActionListener(my2);
//设置替换编码
textField.setEchoChar('*');
pack();
setVisible(true);
}
}
class MyActionListener2 implements ActionListener{

@Override
public void actionPerformed(ActionEvent e) {
TextField field = (TextField) e.getSource();//获得一些资源,返回一个对象
//获得输入框中的文本
System.out.println(field.getText());
field.setText("");//null
}
}

2.6、简易计算器,组合内部类回顾复习

目前代码

1
2
3
4
5
6
7
8
9
10
11
12
13
14
15
16
17
18
19
20
21
22
23
24
25
26
27
28
29
30
31
32
33
34
35
36
37
38
39
40
41
42
43
44
45
46
47
48
49
50
51
52
53
54
55
56
57
58
59
package GUI.lesson2;

//简易计算器

import java.awt.*;
import java.awt.event.ActionEvent;
import java.awt.event.ActionListener;

public class TestCalc {
public static void main(String[] args) {
new Caculator();
}
}
//计算器类
class Caculator extends Frame{
public Caculator(){
//3个文本框
TextField num1 = new TextField(10);//字符数
TextField num2 = new TextField(10);//字符数
TextField num3 = new TextField(20);//字符数
//1个按钮
Button button = new Button("=");
button.addActionListener(new MyCalculatorListener(num1,num2,num3));
//1个标签
Label label = new Label("+");
//布局
setLayout(new FlowLayout());
add(num1);
add(label);
add(num2);
add(button);
add(num3);

pack();
setVisible(true);
}
}
//监听器类
class MyCalculatorListener implements ActionListener{

private TextField num1,num2,num3;
public MyCalculatorListener(TextField num1,TextField num2,TextField num3){
this.num1 = num1;
this.num2 = num2;
this.num3 = num3;
}
@Override
public void actionPerformed(ActionEvent e) {
//1.获得加数和被加数
int n1 = Integer.parseInt(num1.getText()); //String类型
int n2 = Integer.parseInt(num2.getText()); //String类型
//2.将这两个值加法运算后放到第三个框
num3.setText(""+(n1+n2));
//3.清楚前两个框
num1.setText("");
num2.setText("");
}
}